
In today's digital age, our time is taken up by a variety of tasks, and the demands don't seem to be slowing down. If you're looking for a way to bring some structure to this chaos, you've come to the right place.
Introduction
Before we dive into this topic, it's that time of year again, the next hackathon is just around the corner! This topic is a small project I have been working on for our hackathon.
It was an exciting time, with keyboards clattering and caffeine (and tea for some) flowing. For this year's hackathon, I worked on technologizing the Eisenhower Matrix. In my personal life, I need a digitised version of the matrix to prioritise tasks. Unfortunately, there are only a few approaches that provide an Eisenhower Matrix as an application according to my needs. This article describes the Eisenhower Matrix that was created in the hackathon using the Figma software. The concept and use of the Eisenhower Matrix as well as the artefacts created are presented. As a result, an initial design and a clickable dummy of the user interface were created using the Figma software.
Eisenhower Matrix
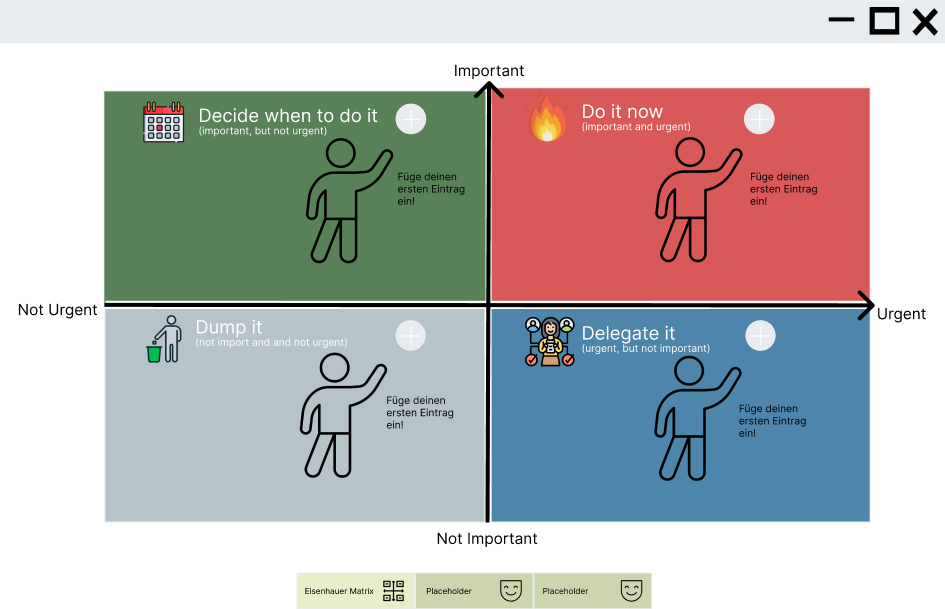
At this point you may be wondering what the Eisenhower Matrix is. If so, the concept is easy to explain. The Eisenhower Matrix is a method of prioritising tasks in a matrix. This requires 4 quadrants in the matrix, which are differentiated according to two criteria: urgency on the one hand and importance on the other. Depending on the quadrant, the task is more or less urgent or important. To get a better idea of the matrix, I have created an Eisenhower matrix below.
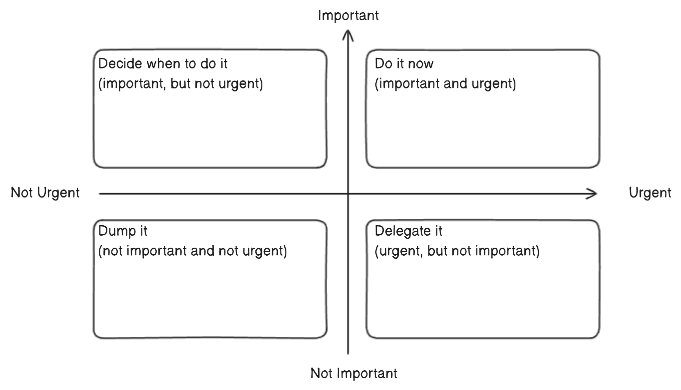
This matrix is divided into four quadrants according to importance and urgency. Each quadrant has its own task. The first quadrant, 'Decide when to do it', may contain tasks that are planned but not yet urgent. The next quadrant, 'Do it now', contains tasks that are important and urgent and should be done immediately. The third quadrant is the "Delegate it" quadrant, which contains tasks that are urgent but not particularly important and can therefore be delegated to other people. The last quadrant is 'Dump it', where you can write down tasks that are not important or urgent and are more of a distraction. Depending on your criteria, you can now assign your tasks to the respective quadrants.
Wireframes
Now you have all the basics you need to follow the blog post. At the beginning of the hackathon I looked at the Eisenhower Matrix in theory and tried to implement it as a wireframe. I used the software eraser to create the wireframes. As a starting point, I created several wireframes based on the Eisenhower Matrix. This means that I created a view where different data could be entered into the matrix. This can be seen in the image below.
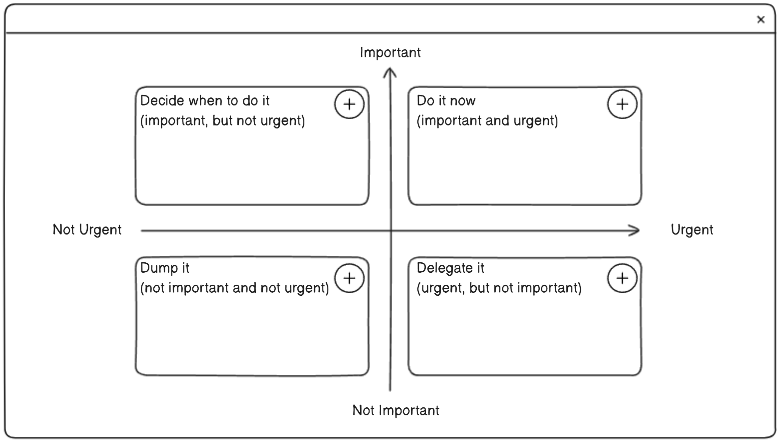
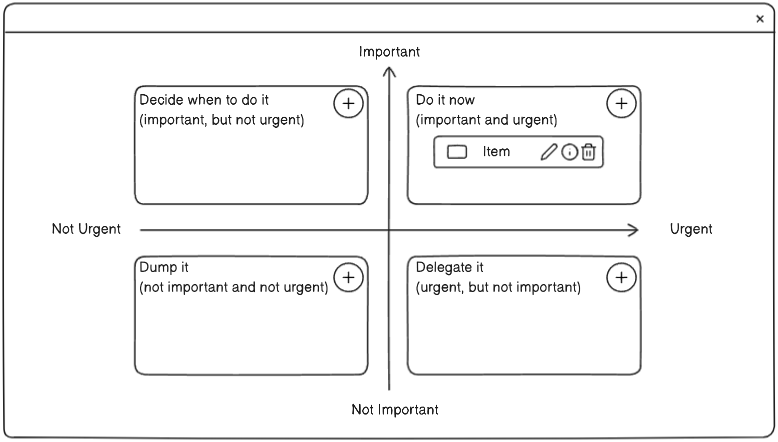
New information can be added to a quadrant using an action button such as the plus sign. I have chosen the carditem to display the information, as shown in the following illustration.
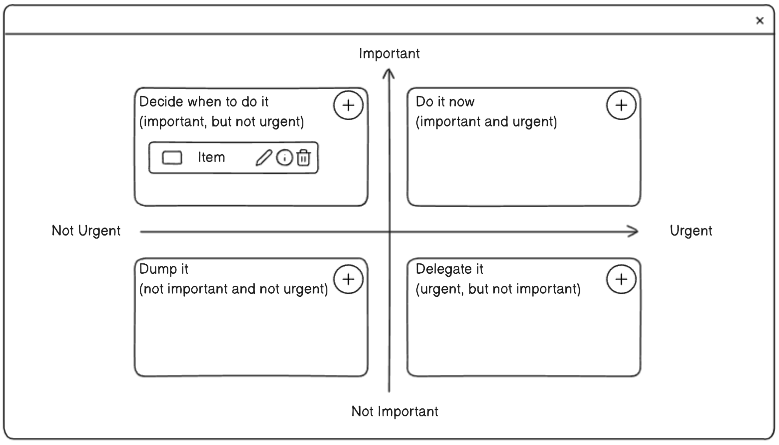
It is simple, clear and not too intrusive for the user. The item can be edited, deleted and filled with information.

It should also be possible to move the element at any time, so that an element can be dragged to a different quadrant. The functions should not restrict the user's work and should therefore be freely usable.
Figma
I chose Figma as the software to create a first prototype. Figma is a cloud-based design platform for creating products in a collaborative environment in a team or alone. The software runs directly in your web browser, no software to install, so you can get started straight away. I chose Figma because I have used it several times and have some experience. If you don't want to use Figma, you can look at alternatives such as Penpot , Adobe XD or Balsamiq . Figma offers several features to make the design process easier. Key features include components, prototype mode and auto-layout. In Figma, components are reusable elements that can be used anytime and anywhere, such as created buttons. Design mode is the most common mode you will find yourself in. In this mode you create your user interface using different elements. In prototype mode, you can link all your elements that you want to be clickable. Once the links are correct, you can run this prototype and click through your design. The final important component is Auto Layout. Figma allows you to create a dynamic design in a simple and straightforward way.
Creating the matrix in Figma
After creating the wireframes, I had visualised my thoughts and had a first approach for a clickable dummy. Then I moved on to Figma. In Figma, I started by defining a colour palette. It is advisable to match the colours to your target audience. So think about it or take a closer look at your target audience and their interests. You can configure the colour palette under "Design" and "Local Styles". Once you have predefined the colours, you can use them at any time later when choosing the colour of an element.
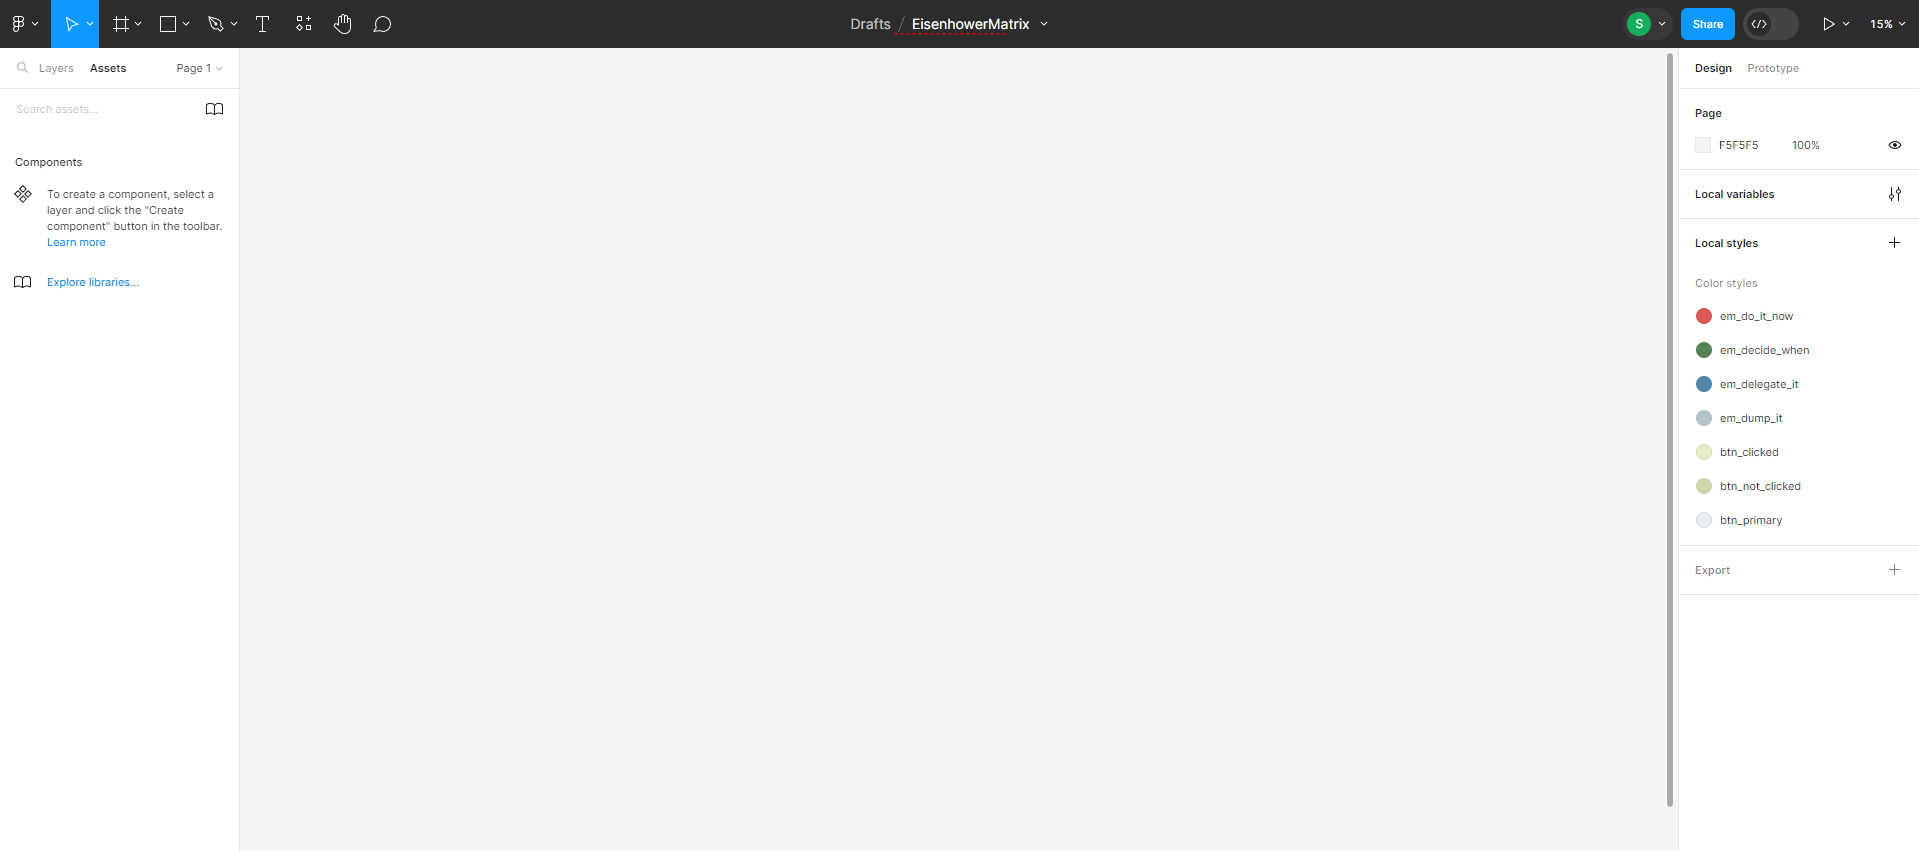
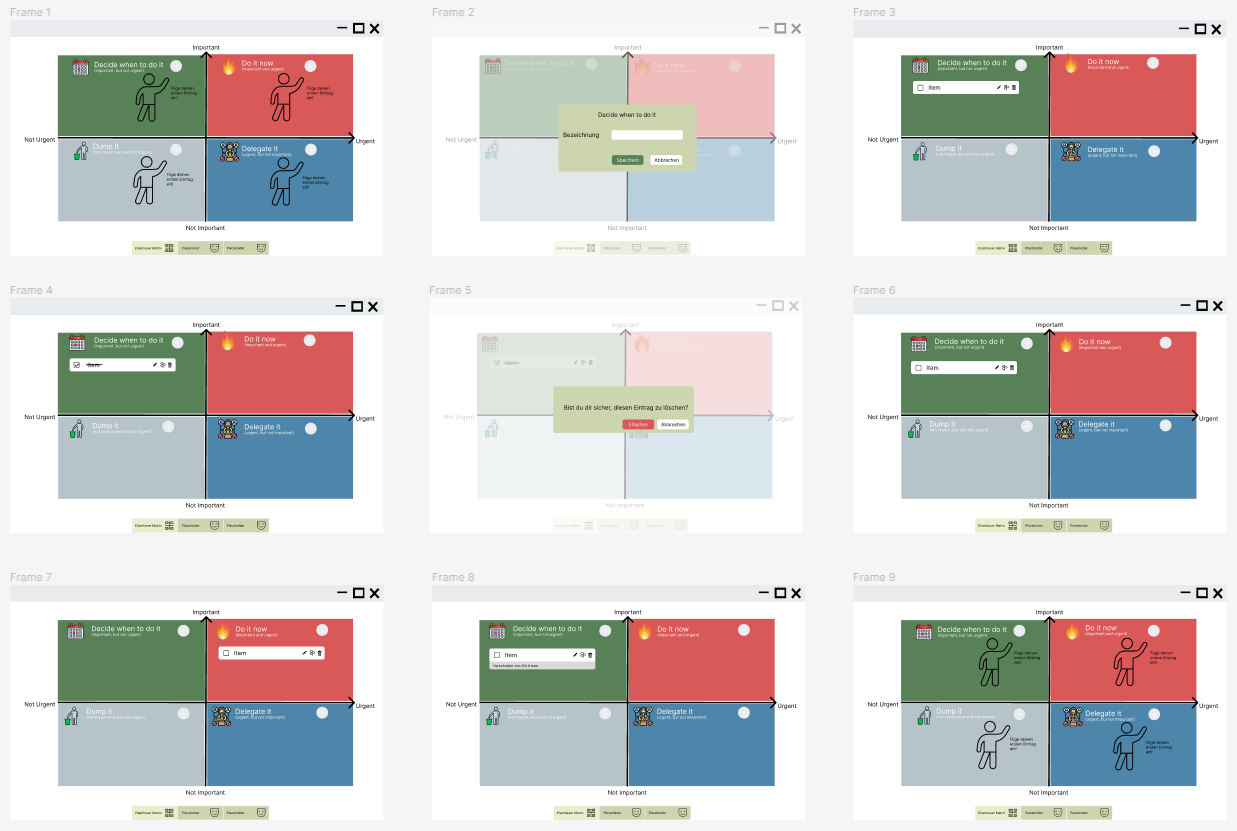
The colour scheme is essentially based on a pastel green, with different accents for certain backgrounds in the matrix. When you create your elements in Figma, make sure that you first place them in what is called a "frame". You can later use the frame to link your elements together and make them interactive and therefore clickable. I started by creating the first screen. This screen displays the matrix of information. An onboarding with key functions can be added; to start with, I decided on a progressive onboarding. When a user starts the application for the first time, important functions are highlighted, such as a button to add a new entry.
I made the pages similar to the wireframes in Figma and the functionality is the same. You can see all the pages that have been created in the image below.
Prototyping the matrix
The next step is to link the various elements together to create an interactive prototype. This prototype can then be used for user tests. To link one element to another, you need to switch from 'Design' to 'Prototype' in Figma.

You will now receive new information and have the option of creating a link to your elements using a "+". You can use this link to connect to other frames and thus to other states of your presentation.

I have linked all the necessary elements in the frames. If you want to actively use your prototype in Figma, click on the "Play" icon in the top right-hand corner.

The prototype will then be built in Figma and you can click through it.
Further steps for the project
A preliminary clickable dummy has been created. This dummy will be tested and evaluated to get feedback and improvements. The next steps in the project are the technical implementation of the design. The target platform for this application is a desktop application. Several frameworks such as Electron or Flutter could be considered.
Conclusion
Super exciting, isn't it? The first prototypes are easy to make with Figma. That's the end of my little project. This was my project for Hackathon 2023!
This year's Hackathon was very informative and exciting. I achieved my goal of creating a clickable dummy. I used Eraser to create the wireframes and Figma to create the clickable dummy. Unfortunately, I didn't have time to create a preliminary technical prototype. But that's not the end of the project. Even after the hackathon the project will continue for me privately. The technical prototype will be created soon.
In this spirit, see you at the next hackathon!

